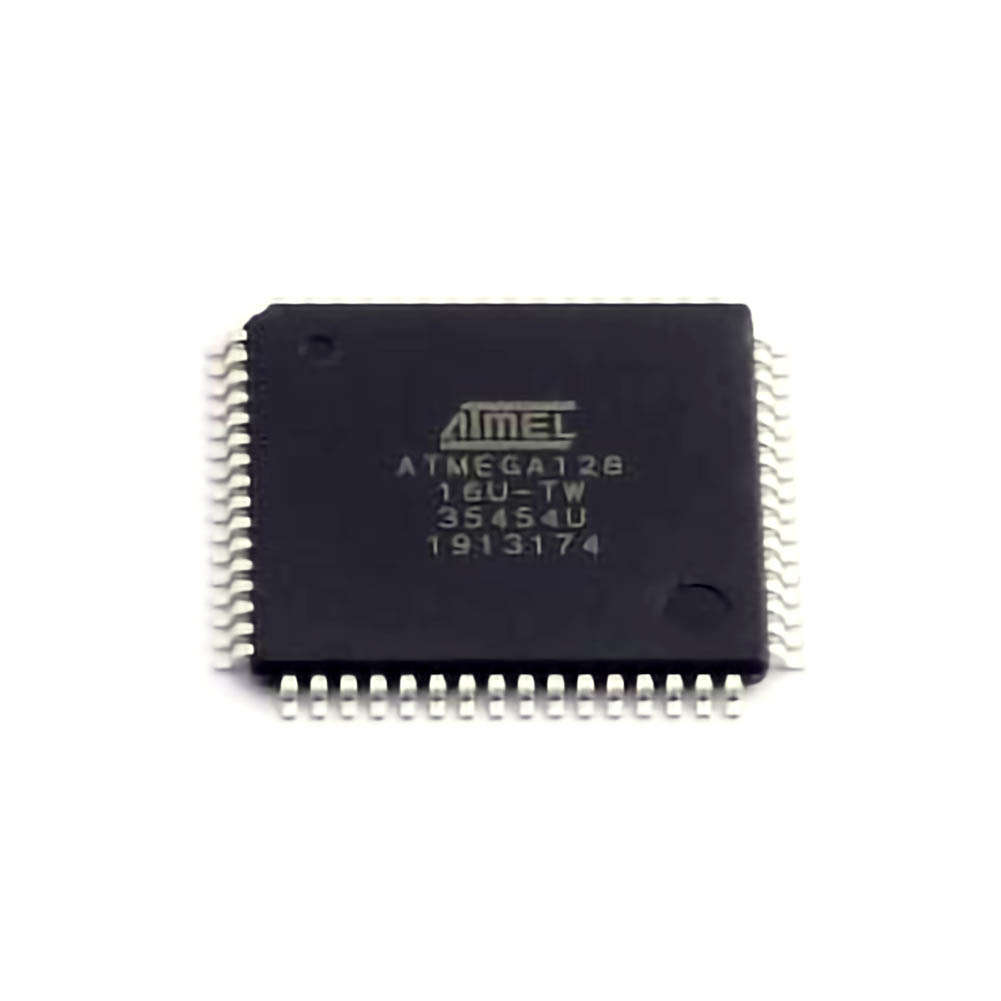
The ATMEGA128-16AU is a Power ful and versatile microcontroller that has been widely used in embedded systems, robotics, and other applications. However, as with any piece of hardware, troubleshooting can be a common necessity when things don’t work as expected. This article explores some of the most common issues users face with the ATMEGA128-16AU, along with solutions and tips to ensure smooth operation.
ATMEGA128-16AU, troubleshooting, microcontroller, embedded systems, AVR, common problems, ATMEGA128 solutions, hardware issues, debugging microcontrollers, programming ATMEGA128, ATMEGA128 errors, embedded development.
Common Troubleshooting Issues with the ATMEGA128-16AU
The ATMEGA128-16AU, manufactured by Microchip Technology, is a member of the ATMEGA family of microcontrollers, based on the AVR architecture. It is widely popular due to its versatility, performance, and ease of use. However, like all complex electronic systems, users often run into issues during the development and deployment phases. In this section, we’ll cover the most common problems users face with the ATMEGA128-16AU and how to troubleshoot them effectively.
1. Power Supply Issues
One of the most common problems faced with any embedded system is inadequate or inconsistent power supply. If your ATMEGA128-16AU is not behaving as expected, a power-related issue might be the culprit.
Solution:
Check Voltage: Ensure that the voltage supplied to the microcontroller is within the required range. The ATMEGA128 typically operates at 5V, but it can also function with a 3.3V supply, depending on the specific model and requirements.
Inspect Power Rails: Use a multimeter to check the power rails (Vcc and GND) for stability and any voltage fluctuations.
Verify capacitor s: Ensure that decoupling capacitors (typically 100nF) are correctly placed near the power pins to smooth any voltage spikes or noise.
2. Incorrect Fuse Settings
The ATMEGA128 microcontroller uses fuses to configure certain aspects of its operation, such as Clock sources and startup options. Incorrect fuse settings can result in a non-functional microcontroller or strange behavior that can be difficult to diagnose.
Solution:
Check Fuse Configuration: The ATMEGA128 comes with a set of fuses that control critical settings such as the clock source (external or internal) and the reset behavior. Make sure that these are configured correctly.
Use Programming Tools: Tools like avrdude or Atmel Studio can help you read and modify fuse settings. If you're unsure of the current fuse configuration, you can always reset the fuses to their default settings.
3. Issues with External Clock Source
The ATMEGA128 supports both internal and external clock sources, and problems with clock configuration can prevent the microcontroller from running as expected. This is especially true if you're using an external crystal or oscillator.
Solution:
Verify Clock Connections: Ensure that the crystal or oscillator is properly connected to the XTAL1 and XTAL2 pins of the ATMEGA128. Check the datasheet for the recommended values of capacitors if you're using a crystal.
Check for Clock Source Selection: Make sure the fuses are set to select the correct clock source. If you're using an external crystal, the correct fuse setting will ensure the microcontroller operates using the external oscillator.
Test with Internal Clock: If you're unsure about the external clock, try using the ATMEGA128's internal clock to rule out issues with the external oscillator.
4. Problems with Programming or Debugging
Programming and debugging issues can be particularly frustrating, especially when the microcontroller appears to be running but not executing the expected code. This could be due to a variety of reasons ranging from hardware connections to software configuration.
Solution:
Check ISP (In-System Programming) Connections: Ensure that the connections between the programmer (e.g., USBasp, USBtiny) and the ATMEGA128 are correct. Pay special attention to the MOSI, MISO, SCK, RESET, Vcc, and GND pins.
Verify Programmer Settings: In your IDE (such as Atmel Studio or Arduino IDE), make sure the correct programmer is selected. Mismatched settings will prevent successful Communication between the computer and the ATMEGA128.
Check for Bootloader Issues: If you're using a bootloader to load your code, ensure that the bootloader is not corrupted and that it's properly instal LED . If you're using the parallel programming method, check the communication lines for any issues.
Use Debugging Tools: AVR-based microcontrollers like the ATMEGA128 support debugging through tools such as the JTAG interface . Use debugging tools to step through the code and examine the values of registers and Memory locations.
5. Incorrect or Corrupted Firmware
A common reason for erratic behavior in embedded systems is a corrupted or incorrect firmware upload. This can occur due to a fai LED programming attempt or misconfiguration in the build process.
Solution:
Reflash the Firmware: If your ATMEGA128 is acting erratically, try reflashing the firmware with the latest compiled version. Ensure that there are no errors during the compilation process that might cause corrupt code to be uploaded.
Verify the Boot Sequence: After reflashing, ensure that the ATMEGA128 is booting into the correct startup code. A missing or corrupted bootloader can prevent proper execution of the firmware.
Check the Firmware Version: Ensure that the firmware you're uploading matches the hardware's capabilities. If you're using libraries or peripherals that require specific configurations, verify that all dependencies are correctly included.
6. Incompatible or Faulty Peripherals
Connecting incompatible or faulty peripherals to the ATMEGA128 can cause unexpected behavior or prevent the system from functioning properly.
Solution:
Check Peripheral Connections: Ensure that peripherals (e.g., sensors, motors, displays) are connected properly. Check datasheets for voltage and current requirements to ensure the ATMEGA128’s I/O pins can handle them.
Verify Driver Software: If you're using external devices or module s that require drivers or specific initialization, ensure the software properly configures the peripherals.
Test with Minimal Setup: If you're unsure whether a peripheral is causing issues, test the ATMEGA128 with a minimal setup, such as just the microcontroller and a simple output like an LED. Gradually add peripherals back into the system to isolate the issue.
Advanced Troubleshooting for the ATMEGA128-16AU
In the second part of this article, we’ll look at more advanced troubleshooting techniques and solutions to address deeper issues related to the ATMEGA128-16AU. These issues might require more detailed inspection and advanced tools, but with the right approach, they can be resolved efficiently.
1. Interference and Noise in Signal Lines
Signal integrity is crucial when working with microcontrollers. The ATMEGA128-16AU has several digital and analog input/output pins that can be prone to noise and interference, especially in high-speed systems.
Solution:
Use Proper Grounding: Ensure that the ground plane is solid and continuous throughout the circuit. A weak or disconnected ground can introduce noise into the system.
Shielding and Filtering: Use decoupling capacitors (typically 100nF to 1µF) near the power supply pins and signal lines to filter out high-frequency noise. For sensitive analog signals, consider using shielded cables.
Shorten Signal Lines: Keep signal lines as short as possible to minimize the effects of electromagnetic interference ( EMI ). This is especially important for high-speed signals or analog inputs.
2. Overheating or Physical Damage
If the ATMEGA128-16AU gets too hot, it might indicate that the microcontroller is being overpowered or that there's a short circuit somewhere in the system. Overheating can lead to malfunctioning and permanent damage if not addressed.
Solution:
Check for Short Circuits: Inspect the PCB for any potential short circuits. Use a multimeter to test for continuity between power rails and GND.
Monitor Temperature: Use an infrared thermometer to monitor the temperature of the microcontroller during operation. If it gets too hot, power down the system and investigate potential sources of heat, such as power-hungry peripherals or insufficient cooling.
Use a Heat Sink: If the ATMEGA128 is operating under heavy load, consider adding a heat sink or improving the cooling of the system.
3. Memory Overflows and Stack Issues
Large projects or projects with complex algorithms can sometimes cause memory overflows or stack-related issues. This can lead to erratic program behavior, crashes, or even hardware damage if not carefully managed.
Solution:
Check Memory Usage: Use debugging tools to monitor memory usage, including SRAM and flash memory. Tools like AVR-GCC can provide memory maps that show how much space your program occupies in flash and SRAM.
Optimize Code: If you're running into memory issues, consider optimizing your code to reduce memory usage. This might include using more efficient algorithms, reducing global variables, or using smaller data types.
Use Stack Protection: The ATMEGA128 has built-in stack protection mechanisms. Ensure that the stack does not grow too large by monitoring stack usage during debugging.
4. Advanced Communication Issues (USART, SPI, I2C)
The ATMEGA128-16AU supports several communication protocols, including USART, SPI, and I2C. Communication issues can arise if these protocols are misconfigured or if hardware issues interfere with data transmission.
Solution:
Check Baud Rate and Settings: Ensure that the baud rate, parity, stop bits, and other communication settings are correctly configured. Mismatched settings can cause garbled data or failed communication.
Use Logic Analyzer: To diagnose communication issues, use a logic analyzer to monitor the signals on the relevant communication pins. This will allow you to see if the expected signals are being transmitted and received correctly.
Use Pull-up Resistors : For I2C communication, ensure that pull-up resistors are in place on the SDA and SCL lines. Incorrect resistor values or missing resistors can cause communication failures.
5. Software Debugging and Optimization
Finally, software bugs can often be the source of subtle and difficult-to-diagnose problems. Even with perfect hardware, inefficient or buggy code can cause the system to behave unexpectedly.
Solution:
Use Breakpoints and Step Debugging: Take advantage of debugging tools and step through your code line-by-line to identify where things go wrong.
Optimize for Performance: If your program is running slowly or with delays, consider optimizing the code to improve performance. Look for inefficient loops, redundant calculations, or excessive blocking operations.
By following these troubleshooting steps, you can effectively diagnose and fix common issues with the ATMEGA128-16AU, ensuring that your embedded projects run smoothly and efficiently. Whether you're dealing with power issues, programming problems, or hardware failures, there are solutions at hand to help you get back on track.
Partnering with an electronic components supplier sets your team up for success, ensuring the design, production, and procurement processes are quality and error-free.


